こんにちは、もえぎです!
現在、独学でWeb制作を勉強中の私が取り組んでいる、しょーごログさんのコーディング練習課題について、中級編2つ目の合格を無事にいただいたので、備忘録として今回投稿します。
中級編は2つありどちらも取り組むことができます!ただし、無料で添削を受けられるのはどちらか1つです。
私は2つ目を添削に出したので、1つ目はセルフチェックまで実施しました。
・現役エンジニアによる「2回のレビュー特典」付き
・全課題「オリジナルポートフォリオ化」して、ポートフォリオとして利用できる
・「コーディング→セルフチェック→アップロード→再セルフチェック→レビュー依頼→修正→完成」という実案件の流れを経験できる
私が取り組んでいる「全部盛りセット」は単品購入よりも25%お得になります!
\ 詳細はこちら! /
「しょーごログのコーディング練習課題とは何か?」「私がしょーごログのコーディング練習課題に取り組み始めた理由と感想」は、以下の記事で紹介しているので、気になる方はご覧ください!


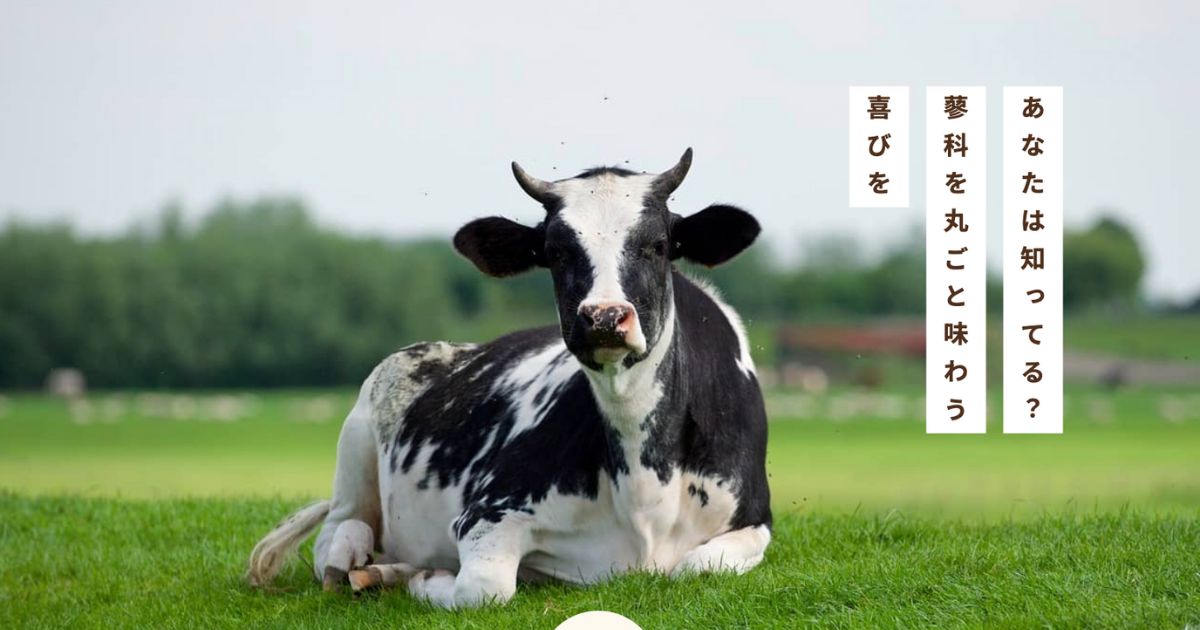
中級編「蓼科ごとう農園」の概要
私が今回の練習課題で作成したWebサイトはこちらです!
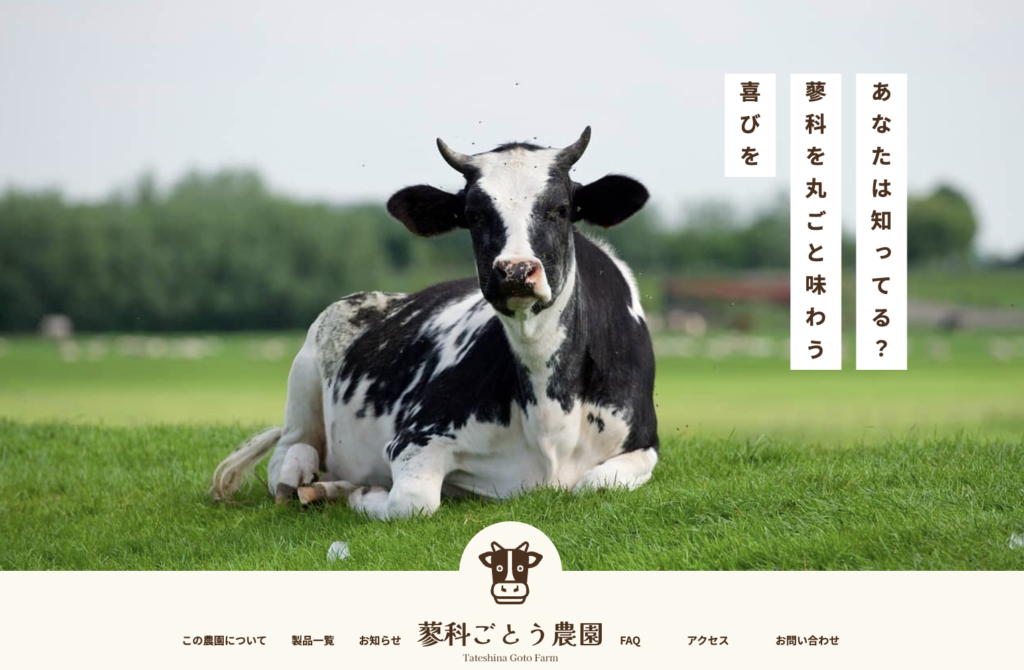

ユーザー名:demo
パスワード:demo
所要時間
添削後の修正完了までの合計所要時間は、19時間49分でした!
ハンバーガーメニューやアコーディオンリストなどjQueryの実装は、中級編1つ目で作ったものをほぼそのまま使うことができたので、思ったよりも時間がかからずにできました。
中級編1つ目で苦労したことを活かすことができて嬉しかったです!
前提条件
コーディンング練習課題の中級編に取り組むための前提条件は、「コーディング練習課題、初級Ex編をクリアできるほどの実力があること」「jQueryやJavaScriptの基礎学習が終わっていること」です。
CSS設計もこの時点で学習しておくと、コーディング効率を上げることができるのでおすすめです!
CSS設計については、以下の記事で解説しています。


コーディング練習課題、初級Ex編については、以下の記事で解説しています。


学べること
- position:relativeやabsolute、staticを使った位置の指定
- ハンバーガーメニューの実装(スマホでのみ表示させる方法)
- アコーディオンの実装
- ローディング画面の実装
- Swiperの実装
- お問い合わせフォームの作成
- お問合せフォームを実際に動作するようにする方法(Googleフォームとの紐付け)
中級編「蓼科ごとう農園」の学習記録
コーディングをしていて難しいと感じたところについて、記録していきます!
コードは各項目に該当する部分のみ抜粋しています。
ローディング画面
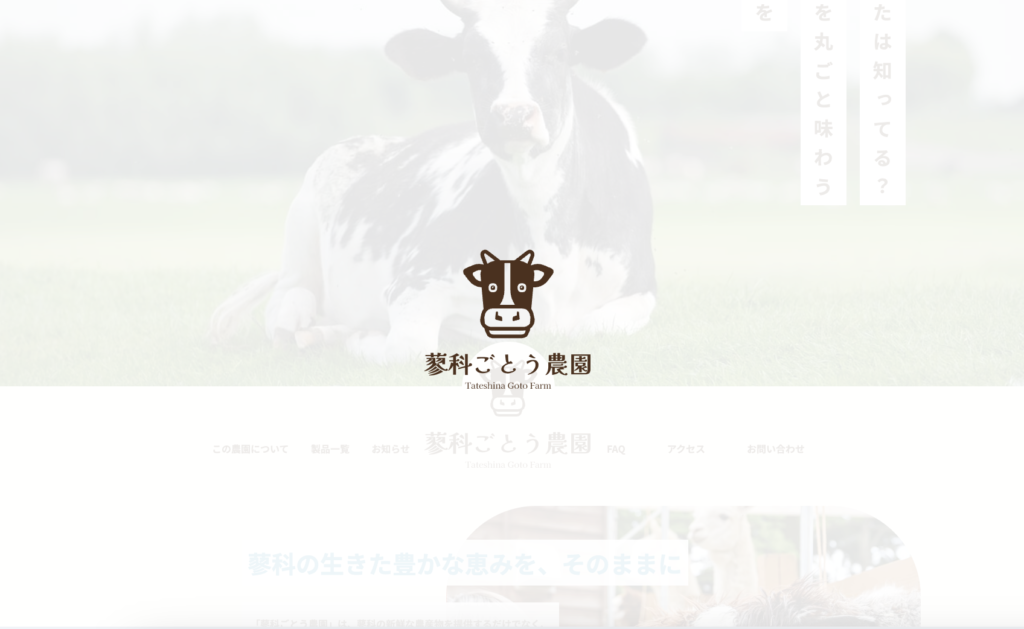
サイトログイン時にローディング画面が表示されるようにします。
今回はサイトロゴを利用しました。

<div class="loading__wrapper">
<div class="loading">
<img src="images/logo-01.svg" class="loading__logo" alt="">
<img src="images/logo-02.png" alt="loading__ttl">
</div>
</div>
.loading{
position: fixed;
top: 50%;
left: 50%;
transform: translateX(-50%);
display: flex;
flex-direction: column;
align-items: center;
&__wrapper {
width: 100%;
height: 100vh;
background: $color-bg-white-90;
position: fixed;
top: 0;
left: 0;
z-index: 4000;
}
&__logo{
width: 50%;
}
&__none {
animation: loading-anime 1s forwards;
}
}
@keyframes loading-anime {
0% {
opacity: 1;
}
99% {
opacity: 0;
}
100% {
opacity: 0;
display: none;
}
}function loadingStop() {
$('.loading__wrapper').addClass('loading__none');
}
//画像など読み込まれたら発火の意味
$(window).on('load',function(){
loadingStop();
});コーディング練習課題全部盛りに含まれている、「JavaScript,jQuery特訓編」で実装したローディングの仕様をほとんどそのまま使えました!
半円で飛び出た牛の実装
position:relativeとabsoluteで、ヘッダーに対して絶対的に位置を指定しました。


<header class="header">
<div class="header__inner inner">
<div class="header__logo">
<h1><img src="images/logo-01.svg" alt="" class="site-logo__img"></h1>
</div><!-- /.header__logo -->
</div><!-- /.header__inner -->
</header><!-- /.header -->
.header{
background-color: $color-bg-bage;
position: relative;
&__logo{
position: absolute;
top: -74px;
left: 50%;
transform: translateX(-50%);
background-color: $color-bg-bage;
border-radius: 50%;
width: 154px;
height: 154px;
padding: 29px;
}
}中級編では、positionの指定が多く出てくるので、曖昧だったところを学習し直すことができて良かったです!
position: absolute; は、最も近い親要素の中で position プロパティが relative, absolute, fixed, または sticky に設定されている要素に対して位置が決まる。
もし、そのような親要素が見つからない場合は、最初の親要素に対して相対的な位置を決める。
ヘッダーナビにサイトタイトルを含めて横並びにする
ナビ左側、サイトタイトル、ナビ右側をdisplay:flexで横並びにしました。
<nav class="header-nav">
<ul class="header-nav__list">
<li class="header-nav__item--left"><a href="#about">この農園について</a></li><!-- /.header-nav__item -->
<li class="header-nav__item--left"><a href="#product">製品一覧</a></li><!-- /.header-nav__item -->
<li class="header-nav__item--left"><a href="#info">お知らせ</a></li><!-- /.header-nav__item -->
</ul><!-- /.header-nav__list -->

<div class="header-nav__logo">
<h1><a href="#"><img src="images/logo-02.png" alt="" class="site-logo__ttl"></a></h1>
</div><!-- /.header-nav__logo -->

<ul class="header-nav__list">
<li class="header-nav__item--right"><a href="#faq">FAQ</a></li><!-- /.header-nav__item -->
<li class="header-nav__item--right"><a href="#access">アクセス</a></li><!-- /.header-nav__item -->
<li class="header-nav__item--right"><a href="#contact">お問い合わせ</a></li><!-- /.header-nav__item -->
</ul><!-- /.header-nav__list -->
</nav><!-- /.header-nav -->
.header-nav{
display: flex;
align-items: center;
justify-content: space-between;
padding-top: 53px;
&__list{
position: relative;
flex: 1 33%;
display: flex;
justify-content: space-between;
}
}
flex: 1 33%;は、CSSのFlexboxモデルで使用されるプロパティの1つです。
利用条件は、親要素に、display:flex;が指定されていることです。
このプロパティは、flex-grow、flex-shrink、flex-basisの3つの値を組み合わせて指定します。
・flex-grow(デフォルト値は0)
アイテムが余白領域をどれだけ拡大できるかを決定する。
この値がゼロでない場合、アイテムは利用可能なスペースを占有するように伸びる。
・flex-shrink(デフォルト値は1)
アイテムがどれだけ縮小できるかを決定する。
この値がゼロでない場合、アイテムは必要なスペースよりも大きい場合に縮小される。
・flex-basis(デフォルト値はauto)
アイテムのサイズを決定するための基準値。
通常、幅や高さなどの値で指定される。
つまり、flex: 1 33%;は、アイテムが余白領域を拡大することができ、アイテムの基準サイズは、親要素の幅の33%に設定されます!
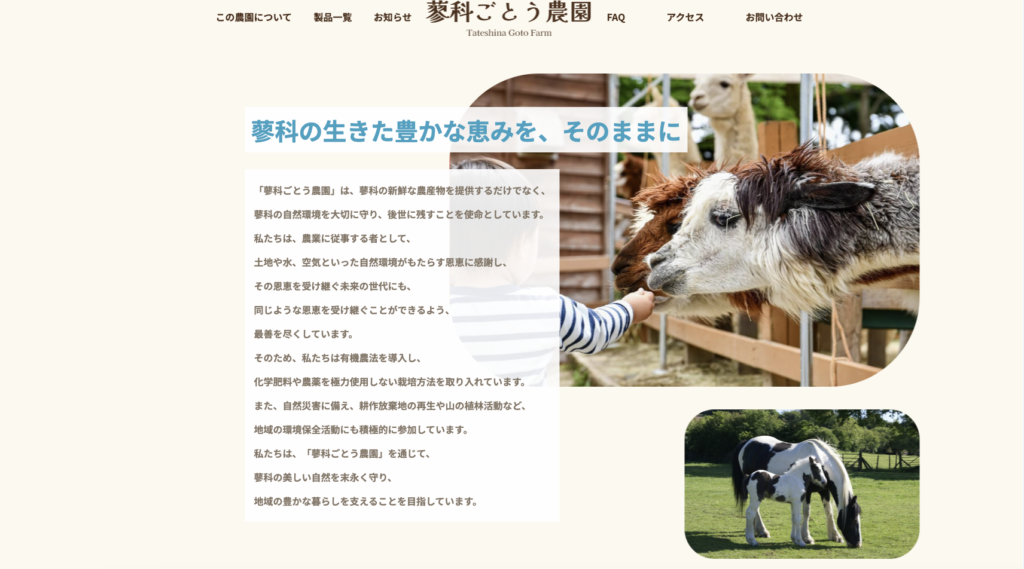
画像が右側に飛び出したデザイン
このセクションでは、画像がinner要素よりも右側に飛び出したデザインになっています。
position:relativeとabsoluteで、aboutセクションに対して絶対的に位置を指定しました。

<section class="about" id="about">
<div class="about__inner inner">
<figure class="about__img--big">
<img src="images/about-01.png" alt="">
</figure><!-- /.about__img--big -->
<figure class="about__img--small">
<img src="images/about-02.png" alt="">
</figure><!-- /.about__img--small -->
</div><!-- /.about__inner -->
</section><!-- /.about -->
.about{
position: relative;
&__inner{
max-width: 924px;
}
&__img--big{
position: absolute;
top: 45px;
right: 10%;
margin-bottom: 38px;
width: 786px;
}
&__img--small{
position: absolute;
top: 607px;
right: 10%;
width: 393px;
}
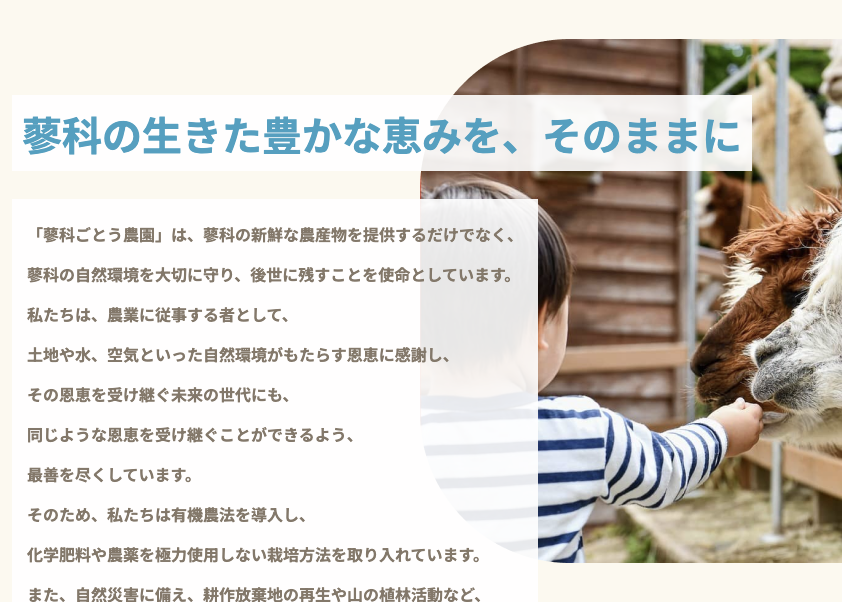
}テキストが画像よりも上に配置されるようにする
z-indexの指定が効かないと思っていたら、positionをrelative、absolute、fixedのどれかに設定しないといけないことを失念していました。

<div class="about__txt-wrapper">
中略
</div><!-- /.about__txt-wrapper -->
.about{
&__txt-wrapper{
position: relative;
z-index: 1000;
}
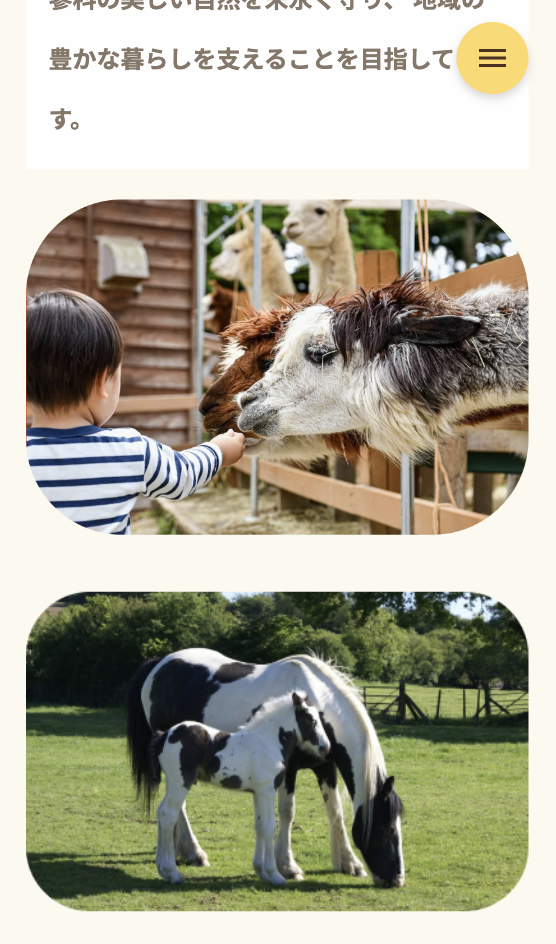
}スマホ幅でposition指定を解除
右側に飛び出していた画像を、スマホ幅では、テキストの下に配置するようにします。

<section class="about" id="about">
<div class="about__inner inner">
<figure class="about__img--big">
<img src="images/about-01.png" alt="">
</figure><!-- /.about__img--big -->
<figure class="about__img--small">
<img src="images/about-02.png" alt="">
</figure><!-- /.about__img--small -->
</div><!-- /.about__inner -->
</section><!-- /.about -->
about{
&__img--big{
@include mq(767px){
position: static;
top: auto;
right: auto;
width: 100%;
margin-top: 20px;
}
}
&__img--small{
@include mq(767px){
position: static;
top: auto;
right: auto;
width: 100%;
margin-top: 20px;
text-align: center;
}
}
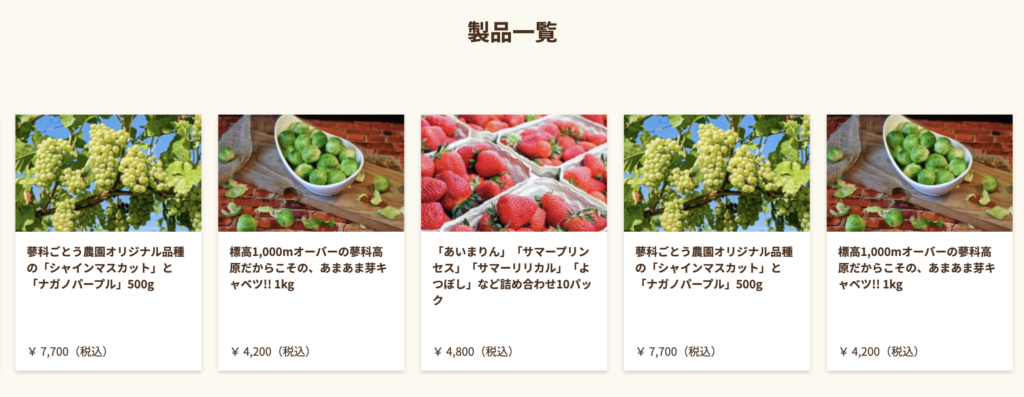
}Swiperの実装
要素が無限ループしたり、ユーザーがつかんで動かせるようにしたりします。
以下CDNの読み込みが必要です。
・headタグ内
<link rel=”stylesheet” href=”https://cdn.jsdelivr.net/npm/swiper@11/swiper-bundle.min.css”/>
・bodyタグ終了直前
<script src=”https://cdn.jsdelivr.net/npm/swiper@11/swiper-bundle.min.js”></script>
最新バージョンを確認したい方は、公式サイトをご参照ください。

<div class="swiper">
<!-- Additional required wrapper -->
<div class="swiper-wrapper">
<!-- Slides -->
<div class="swiper-slide">
<figure class="swiper-slide__img-wrapper"><img src="images/strawberries.png" alt="" class="swiper-slide__img"></figure>
<div class="swiper-slide__txt-wrapper">
<p class="swiper-slide__header">「あいまりん」「サマープリンセス」「サマーリリカル」「よつぼし」など詰め合わせ10パック</p><!-- /.swiper-slide__txt -->
<p class="swiper-slide__price">¥ 4,800(税込)</p><!-- /.swiper-slide__price -->
</div><!-- /.swiper-slide__txt-wrapper -->
</div><!-- /.swiper-slide -->
・・・中略・・・
</div><!-- /.swiper-slide -->
</div><!-- /.swiper-wrapper -->
</div><!-- /.swiper -->
.swiper{
    overflow: hidden;
}
.swiper-wrapper {
    transition-timing-function: linear;
}
.swiper-slide{
    width: 264px;
    &__img{
        width: 100%;
        height: 166px;
        object-fit: cover;
    }
}
$(function(){
const swiper = new Swiper('.swiper', {
loop: true, // ループ有効
speed: 8000, // ループの時間
allowTouchMove: true, // スワイプ有効
grabCursor:true,// 手でスワイプする
centeredSlides:true,// 中心を起点にする
spaceBetween: 24,// 要素間の余白
autoplay: {
delay: 0, // 途切れなくループ
},
breakpoints:{
0:{
slidesPerView:1.2, // 画面に表示するスライドの枚数
},
500:{
slidesPerView:"auto",
},
},
});
});参考
コーディング練習課題購入者限定ページにリンクが貼られている、しょーごログさんの解説Youtubeを参考にしました!
画像が浮いているように配置
position:relativeとabsoluteで、それぞれのセクションに対して絶対的に位置を指定しました。(キャプチャとコードはお知らせセクションのものです。)
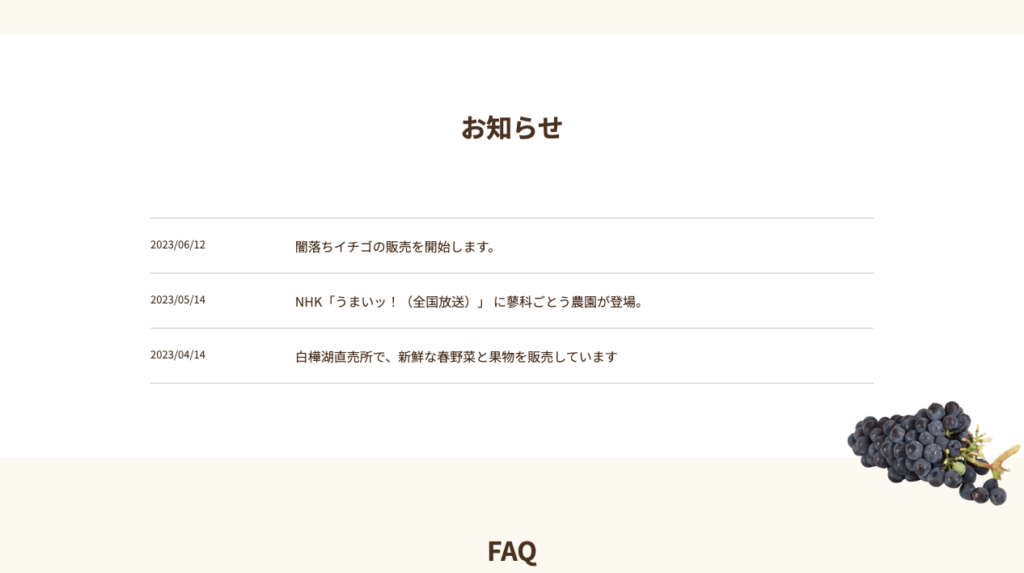

<section class="info" id="info">
<div class="info__inner inner">
<div class="middle-img--right">
<img src="images/grapes-middle.png" alt=""">
</div><!-- /.middle-img--right -->
</div><!-- /.info__inner -->
</section><!-- /.info -->
.info{
padding-bottom: 91px;
position: relative;
}
.middle-img--right{
position: absolute;
right: 0;
z-index: 1000;
}Questionボックスクリックで矢印の向きを変える
rotate–315クラスをjQueryでつけたりとったりして実装しました。


<section class="faq" id="faq">
<div class="faq__inner inner">
<h2 class="section-ttl">FAQ</h2><!-- /.section-ttl -->
<dl class="faq__list">
<dt class="faq__question">冷蔵便で配送できますか?</dt><!-- /.faq__question -->
<dd class="faq__answer">冷蔵便→冷蔵便に対応しています。その場合別途150円かかります。</dd><!-- /.faq__answer -->
・・・中略・・・
</dl><!-- /.faq__list -->
</div><!-- /.faq__inner -->
</section><!-- /.faq -->
.faq{
    &__question{
        position: relative;
        &::after{
            content: "";
            display: block;
            position: absolute;
            top: 35%;
            right: 20px;
            width: 10px;
            height: 10px;
            border-top: 3px solid $color-border;
            border-right: 3px solid $color-border;
            transform: rotate(135deg);
            transition: .1s;
        }
        &.rotate--315::after {
            transform: rotate(315deg);
        }
    }
$(function(){
$(".faq__question").click(function(){
// faq__answerクラスを開いたり閉じたりする
$(this).next().toggleClass("faq--open");
// 矢印を回転させる
$(this).toggleClass("rotate--315");
});
});ラジオボタンのスタイル調整
デフォルトのラジオボタンのスタイルを初期化して、デザインカンプ通りのラジオボタンのスタイルを新たに設定します。
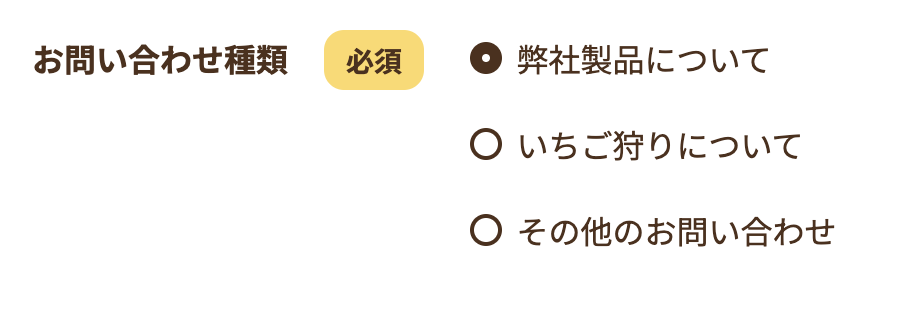

<div class="contact-form__item">
<p class="contact-form__ttl">お問い合わせ種類<span class="contact-form--must">必須</span></p><!-- /.contact-form__ttl -->
<div class="radio__wrapper">

<span class="radio__item">
<label for="kinds" class="radio__label">
<input type="radio" name="entry.2138907507" id="kinds" class="radio__btn" name="radio-name"
 value="弊社製品について" checked>
<span class="radio__label--custom">弊社製品について</span><!-- /.radio__label--custom -->
</label><!-- /.radio__label -->
</span><!-- /.radio__item -->

<span class="radio__item">
<label for="kinds02" class="radio__label">
<input type="radio" name="entry.2138907507" id="kinds02" class="radio__btn" name="radio-name"
value="いちご狩りについて">
<span class="radio__label--custom">いちご狩りについて</span><!-- /.radio__label--custom -->
</label><!-- /.radio__label -->
</span><!-- /.radio__item -->

<span class="radio__item">
<label for="kinds03" class="radio__label">
<input type="radio" name="entry.2138907507" id="kinds03" class="radio__btn" name="radio-name"
value="その他のお問い合わせ">
<span class="radio__label--custom">その他のお問い合わせ</span><!-- /.radio__label--custom -->
</label><!-- /.radio__label -->
</span><!-- /.radio__item -->

</div><!-- /.radio__wrapper -->
</div><!-- /.contact-form__item -->
.radio{
&__wrapper{
display: flex;
flex-direction: column;
}
&__item{
padding-bottom: 10px;
font-weight: $weight-400;
}
&__btn{
/* デフォルトのラジオボタンを初期化 */
position: absolute;
opacity: 0;
z-index: -1000;
}
&__label{
/* 新しいラジオボタンの位置を設定 */
position: relative;
display: inline-block;
padding-left: 23px;
margin-bottom: 10px;
cursor: pointer;
/* 新しいラジオボタン(チェック前)のスタイルを設定 */
&--custom::before{
content: "";
display: inline-block;
width: 16px;
height: 16px;
border: 2px solid $color-txt-main;
border-radius: 50%;
position: absolute;
left: 0;
top: 50%;
transform: translateY(-50%);
}
}
/* チェックされた時のスタイルを設定 */
&__btn:checked + &__label--custom::before {
content: "";
background: $color-txt-main;
}
&__btn:checked + &__label--custom::after {
content: "";
display: block;
width: 4px;
height: 4px;
background-color: $color-bg-white;
border-radius: 50%;
position: absolute;
top: 50%;
transform: translateY(-50%);
left: 6px;
}
}また、ラジオボタンでの注意事項として、項目のname属性を揃えないと、ラジオボタンとして正しく機能しないので注意です!(私はここに引っかかりました)
参考
しょーごログさんの参考記事がわかりやすかったです!


お問い合わせフォームに送信制御をかける
全ての必須項目の入力が完了するまで、送信ボタンを押すことができないようにします。
入力完了前は、送信ボタンを押しても何も反応しません。
また、見た目にもわかりやすいように、送信ボタンがグレーアウトされています。
・入力完了前


・入力完了後


<form action="" id="form" class="contact-form">
・・・中略・・・
<input type="submit" class="submit-btn" disabled>
</form><!-- /.contact-form -->
$(function(){
const $submitBtn = $(".submit-btn")
$("#form input,#form textarea").on("change", function () {
if (
$("#form input[type='radio']").val() !== "" &&
$("#form #name").val() !== "" &&
$("#form #address").val() !== "" &&
$("#form #call").val() !== ""
) {
$submitBtn.prop("disabled", false);
} else {
$submitBtn.prop("disabled", true);
}
});
});「disabled」をsubmit-btnクラスからとったりつけたりしています。
参考
こちらもしょーごログさんの参考記事がわかりやすかったです!

お問い合わせ完了でサンクスメッセージを表示
お問い合わせフォームの送信ボタンが押されて、送信に成功したら、「お問い合わせありがとうございました。」の文言を表示します。
送信失敗の場合は、「送信に失敗しました。」と表示されます。
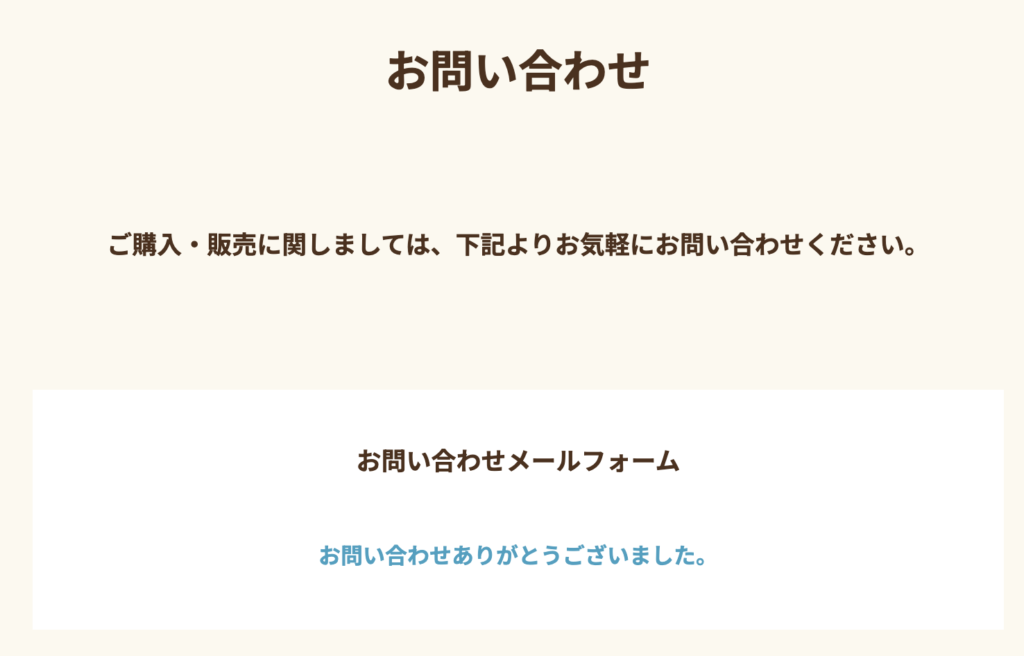

<form action="" id="form" class="contact-form">
<p class="contact-form__txt">お問い合わせメールフォーム</p><!-- /.contact-form__txt -->
<div class="contact-form__item">
・・・中略・・・
</div><!-- /.contact-form__item -->
・・・中略・・・
<input type="submit" class="submit-btn" disabled>
<p class="end-message">お問い合わせありがとうございました。</p>
<p class="false-message">送信に失敗しました。</p>
</form><!-- /.contact-form -->
</div><!-- /.contact__inner -->
</section><!-- /.contact -->
.end-message {
display: none;
text-align: center;
color: $color-txt-second;
}
.false-message {
display: none;
text-align: center;
color: $color-txt-second;
}$(function(){
$('#form').submit(function (event) {
var formData = $('#form').serialize();
$.ajax({
url: "formタグのactionと同じURLを記述",
data: formData,
type: "POST",
dataType: "xml",
statusCode: {
0: function () {
$(".end-message").slideDown();
$(".submit-btn").fadeOut();
$(".contact-form__item").fadeOut();
//window.location.href = "thanks.html";
},
200: function () {
$(".false-message").slideDown();
}
}
});
event.preventDefault();
});
});参考記事
こちらもしょーごログさんの記事を参考にしています!


まとめ
中級編は、JavaScript(jQuery)を用いて動きを出す実装が多くなるので、一気に実際のWebサイト感が増します!
作り終えた時の達成感がとても大きいです!
個人的には、苦手意識のあった、positionの使い方を学び直せたのも良かったです。
全体的に、初級Exと比べてかなり難しくなりましたが、とてもためになる内容ばかりだったので、実際の案件前に取り組むことができて良かったと感じました。
私は、しょーごログさんの「コーディング練習課題全部盛りセット」を購入して学習を進めています。
こちらのセットは、単品購入よりも25%お得になります。
現役エンジニアの添削を受けることができ、オリジナルポートフォリオ化したものは自分のポートフォリオとしても利用できますので、気になる方は見てみてください!
・現役エンジニアによる「2回のレビュー特典」付き
・全課題「オリジナルポートフォリオ化」して、ポートフォリオとして利用できる
・「コーディング→セルフチェック→アップロード→再セルフチェック→レビュー依頼→修正→完成」という実案件の流れを経験できる
私が取り組んでいる「全部盛りセット」は単品購入よりも25%お得になります!
\ 詳細はこちら! /
